| 关于粒子效果的制作,teal教程系列。 |
| 作者:梦翔儿 日期:2007-6-17 22:49:00 |
在sl的teal实验室学到的一些知识,有些英文,简单的就不翻译了。
others depending on what you're trying to do.
There are two things to remember when choosing
a prim to put particles on: 有两件事情,需要记住,当在一个prim中应用粒子效果时:
1) SIZE: Use small with small and big with big.
Tiny particle effect? pick tiny particles and tiny prims. BIG particle effect? pick BIG prims and BIG particles. (why will be explained later) 小的效果用在小的物品上,返之成立。
2) ROTATION and SHAPE: Some 'angular' particle
displays are sensitive to the rotation of their source prim. Some prims, like Sphere, Torus, Ring and Tube are created turned on their side, others aren't. 有一些是用在旋转物体上的,有些prims比如:象球形、花托、圆环和管,是应用在侧面,有些则不是。 Particle Anatomy - Creating New Scripts
(how to attach an existing scripts is included below) ---------------------------------------------------------- Scripts can be created two ways:
下面是创建scripts的两个方法
1) Right-click on a folder in your personal inventory and select 'New Script'.
Rename the script so you can find it again later. (It's helpful to put a 'v1' or 'dec05' at the end of the name, so that you'll know it is 'version 1' or 'written in december 2005') Double-click on the new script in your inventory to open the Script Editing Window. Hack away. Click (Save)... fix any errors that pop up... (Save) again until it compiles. Click [X] to close the script window. 在inventory菜单,注意版本号的标记是个好习惯。
2) Create or edit an existing a prim (one in the world, not in your inventory) Click ( MORE >>) to expand the edit options Click on the [ Content ] tab Click ( New Script ... ) Hack away. Click (Save)... fix any errors that pop up... (Save) again until it works. Click [X] to close the script window. 在已经编辑好的prim中,可以在more中的content中新建
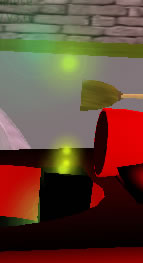
There are several sample particle scripts in the particle lab, but here's an example of one created from scratch: 下面这个粒子效果,我试过了,可以形成一个黄色的粒子柱效果,很不错的。我放在我的车里测试了,还好。
 // JP Basic Particle Example Dec05 - for particle lab demo default { state_entry() { llParticleSystem( [ PSYS_PART_START_SCALE, <0.04,0.04,0.0>, PSYS_PART_END_SCALE, <2.0,2.0,0.0>, PSYS_PART_START_COLOR, <1.0,1.0,0.0>, PSYS_PART_END_COLOR, <0.0,1.0,1.0>, PSYS_PART_START_ALPHA, 1.0, PSYS_PART_END_ALPHA, 0.0, PSYS_SRC_BURST_PART_COUNT, 1, PSYS_SRC_BURST_RATE, 0.1, PSYS_PART_MAX_AGE, 3.0, PSYS_SRC_PATTERN, PSYS_SRC_PATTERN_ANGLE_CONE, PSYS_SRC_ACCEL, <0.0,0.0,-1.0>, PSYS_SRC_BURST_SPEED_MIN, 0.3, PSYS_SRC_BURST_SPEED_MAX, 2.3, PSYS_PART_FLAGS, ( PSYS_PART_EMISSIVE_MASK | PSYS_PART_WIND_MASK | PSYS_PART_FOLLOW_VELOCITY_MASK | PSYS_PART_INTERP_COLOR_MASK | PSYS_PART_INTERP_SCALE_MASK ) ] ); } } -------------------
Attaching Scripts ------------------- There are two ways to attach an existing script to a prim:
1) Drag it from your inventory and drop it on the prim.
2) Edit the prim, open the [ Content ] tab,
drag'n'drop the script from your inventory onto the Contents folder of the edit window. If the script has no errors and is running, it will take effect immediately. 编好script后,拖到车上就生效了,不过删除的时侯,有时有些缓存时间。 |
